Process 2013 Group
Shiny Kids
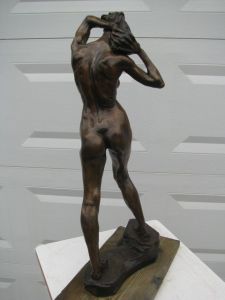
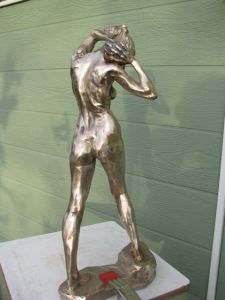
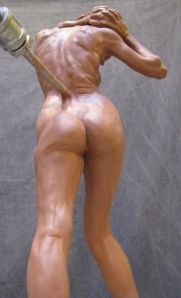
They sure are shiny. That is how I find every little thing wrong with them. Some things require digging a hole to exhume shell inclusion, then welding up the hole. Sometimes I find a bit of texture from the wax seamline that needs finessing, or air gets trapped in the hair and etc during ceramic shell and forms little bronze bubbles and worms that need to be ground out, or wax drips, or whatnots. Next I’ll weld stainless steel nuts up under the bases for when they get their wooden bases way down the road. As long as the welder is out, I’ll do a final pass of filling pits on the figures. Then a last chase, and it is on to sandblast and patina.
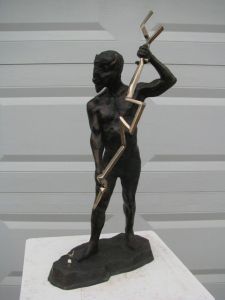
Bison Minotaur with Lighting Bolt
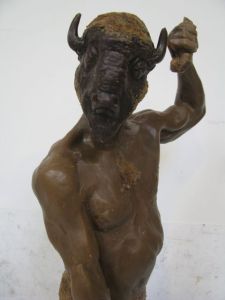
Bison Minotaur surprise: he’s holding a lightning bolt! This was an idea that could only come together after the four separate parts of the lightning were cast in bronze, then welded into place. The bolt is polished to a grey pad. After patina I will polish the bolt up again, and take a small buffer and rouge so it really glows.
Parts to the Hole / Whole
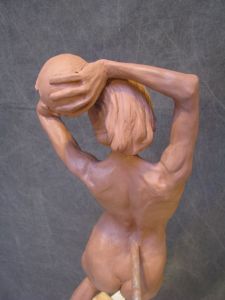
I thought the partial backs had nice character by themselves. Next they are welded into place, along with parts fit the heads, legs, spheres, and arms of the larger male figure. The welds are ground down, and textures of hair and other details are ground to match. Next the grind is blended. After that it is time for touch-up welds, and grinding off all of the wax drips the foundry plopped all over the figures. Getting them perfect takes quite awhile, so there is still quite a way to go.
Alchemist Wax to Bronze
The foundry had these turned around in no time. Some of the pieces were still too hot to touch, as they had just plasma-cut them from the casting tree. Now I chase all the forms and prep all the pieces, then weld everything back together and chase out all the weld lines. They cast clean, so it should be pretty straight forward.
Bison Minotaur

 This fellow was an experiment I’ve been wanting to play with since August. With the three new figures ready to go through casting on Monday, I thought I’d see if I could bring the Bison Minotaur to life and zip him to the foundry on Monday to join the other figures. But what will he have in his hands? That has been made as well, but needs to be cast then welded in place- it will be a surprise (E thinks it is pretty keen). He will be my nod to Western Art for the Western Master’s Show up in Montana this spring.


Process for Silicon Mold to Wax
A few weeks later and everything is off to the foundry for rough-casting! I just need a purge-valve for those last few weeks so my “kill kill kill” meter zero’s out: with our bad smog here in SLC it is still pinging away at redline.
The three figures show distinct stages of silicon mold. The far L has a seam line added (seams are cast in a mold created just for the seams and applied with T-Pins and a layer of fresh silicon as glue). The middle has a strengthening layer of cloth mesh. The R has a final layer of silicon and is prepped with spherical keys and fin keys (waxed paper cups held in place with T-pins with tape sealing the pins) for the plaster mold.
Here all three figures are ready for plaster mold. Now I clean up all silicon process and begin prepping for plaster layup. I cut hemp fiber till I pop a blister on the top of my fingers, and repeat this again and again till I can’t feel it anymore. I have a great little silicon mixing bowl from a specialty kitchen store that I mix the plaster in and can shatter out any remains. I also recommend a small wet-mix blade for the power drill- this airless agitation helps the plaster set up faster.
I do three layers. A wet impression layer, similar to a flick-coat. A well pressed layer of plaster/hemp capturing all undercuts. A final plaster/hemp layer. Then I create ridges of plaster/hemp anywhere additional structural support is useful. The trick is to keep it as light as possible. When it has set overnight or longer I drill out the fin keys for bolts & wingnuts at a standard 1/4 x 20.
The plaster mold seam is ground clean with a flexible-shaft tool and a big grinding head that won’t bind up with plaster. I usually have a bag of small wedges for prying & coaxing the plaster away from the internal silicon mold, but they had disappeared so I used a cat’s paw and a small prybar and controlled monkey-strength. I snapped the molds in a few places, but just mixed up more plaster/hemp/swears and fixed it. I also tore a few key-spheres away from the silicon. 
Here the plaster is separated, but how did that silicon mold separate? I create a seamless mold, as explained in the previous post, so the silicon must be painstakingly cut apart in a maze of zigzag square bladed exacto-knife cuts. This part requires another pair of hands, and E helped me for two solid days of her three-day MLK weekend. The constant hard pull to separate the silicon seam agitated her old whiplash and my old broken ribs. We are gimpy old farts at 45.
The molds made an overnight trip down the highway letting the foundry pull the wax, and it was back to the studio for wax chase. I made a rookie mistake and overtightened the bolts holding the molds together, which skewed the molds off register here and there- just enough to nearly bankrupt the entire endeavor. I am on a tight deadline for casting and can’t take more time for an additional try at better wax forms, leaving me to re-sculpt in wax using the magic of swears, heat guns, sandpaper & lighter fluid, zen meditation, samsara, swears, and many more books on tape. For some reason the male figure’s hand/ball had collapsed, requiring that I pull that area again, cut off the disfigured area and add the new bit in place with the heat of pathological overpatience. Two days later they were back at the foundry for rough-cast.
We will see them again in 3 Mondays, and if all goes well they will be in lots of bronze pieces for me to weld together.
Figures get Smurfy
Now the long industrial process begins with an end goal of these figures in bronze. First thing is pulling silicon molds. The impression layer is the baby blue, the next coat is darker as a warning that I am near the skin for when I cut through the silicon far down the road. Next will be more silicon, mold seams, more silicon with supportive mesh, a final coat; then it is on to the outer supportive shell molding. After the mold is finished and cut open and if everything has gone as planned, then I pour wax into the mold and pull a hollow wax figure. This is brought to the foundry where it is cut apart, encased in ceramic shell, the wax melted out, and bronze poured in. Then the ceramic is shattered and the pieces all come back to me for welding, chasing, patina, and basing.
Such a long way to go. The foundry would charge about $800 per figure just to create the silicon molds- which would eat up my entire budget before I get started. So I’m doing it myself and hoping that I have the complications all figured out, and that I’ll be able to overcome any mistakes. Molds can seize onto the wax form and not come away easily if too many angles oppose eachother, as I have around the head/arms/ball. Kinda giving myself a headache over it all.
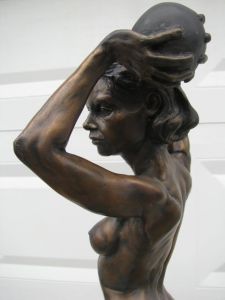
Emily with Heavy Ball #1
Female Figure Finished
Great models are hard to find. This young lady is a great complement to the male figure- she shows tone and structure, yet retains her curves. I have refined her face a bit more since the photos, and she is now under her first layer of silicon mold along with her male counterpart and her other pose.


